Tags

AD+Sign Pro

A Tag is short text attribute you can assign to a Player to categorise and target it. Tags are managed in the Tags page, accessible from the navigation menus.

Why Use Tags?

Tags can be used to identify Players with common attributes like their location or the kind of content they show. For example:

  • A set of 5 Players in one shop could be tagged 'My Shop'.
  • If 2 of those Players were placed upstairs, you could tag those 2 with 'Upstairs'.
  • If 4 of the Players showed content relating to Sales, you could tag them with 'Sale'.
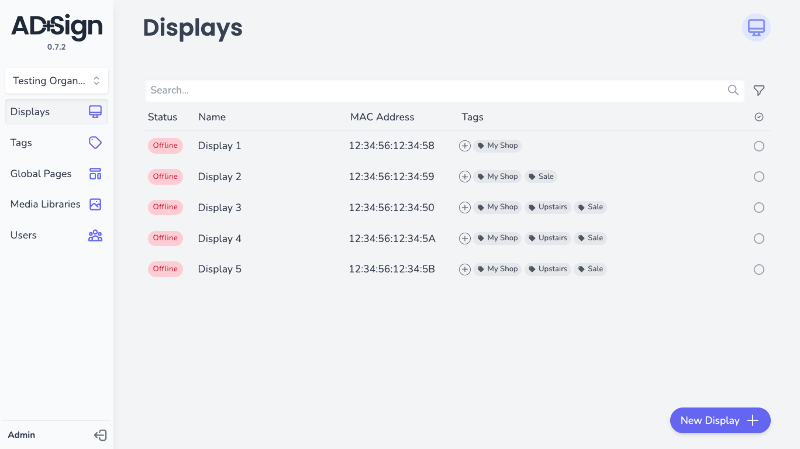
Application screenshot showing a list of Players with text tags
Tagged Player List

Using these Tags, you can use our Rules system to only display certain content on the relevant Players. You could have a single Media Library containing advertising media for all of your products, but only show products found upstairs on the 'Upstairs' tagged Players. This rule means you don't have to manage separate groups of media for separate purposes, you can manage it all in one space.
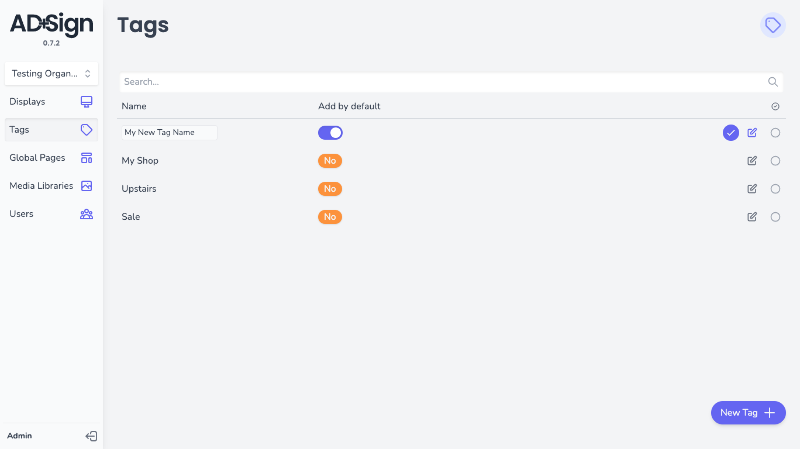
Managing Tags

Creating Tags

  • Click the New Player button to open the 'Create Tag' modal.
  • Give the Tag a name and chose whether or not this Tag is added to new Players by default.
  • Click 'Create Tag' and close the modal.

The new Tag will be added to the bottom of your Tag list.

Editing Tags

  • Find the Tag you wish to edit and press the button.
Application screenshot a list of Tags, one with a text input field and a toggle switch
Edit Mode enabled on a Tag
  • Fill in your new 'Name' and 'Default' values using the input fields that have just appeared on that chosen Tag.
  • Click to confirm your new settings.
  • Alternatively, click again to cancel your changes.

Your Tag will now be updated with your new values

Deleting Tags

  • Select the Tag(s) you wish to delete using the Checkbox button on the right of each Tag list item.
  • Click the button.
  • In the Delete a Tag modal, review the list of Tags that will be deleted.
  • Confirm this deletion using the 'Delete Tags' button

The selected Tags will now be removed from your Organisation

Using Tags

Assigning Tags to a Player

Once you have created a Tag, it can be assigned to a Player in the Players page.

  • Find the Player you wish to add the Tag to and click the in the Tags column
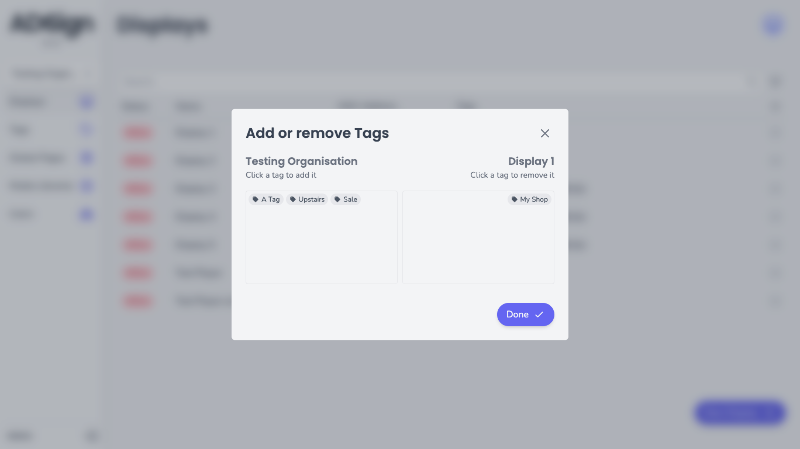
Application screenshot showing an open menu with two lists of tags
Add or remove Tags Modal
  • In the 'Add or remove Tags' modal, click the Tag you want to add to assign it to the Player.
  • To remove a Tag from the Player, click it in the Player column.
  • Click the Done button to close this modal.

Using Player Filters

Players in the Players list can be filtered to make it easier ot find the Tags you need.

Tag filters only apply to the list shown on the Players page. If you have multiple pages, or have searched for a specific term, only the shown results will be filtered.

  • On the Players page, click the button to open the Filters menu.
  • Open the Filter Page By Tag select input and chose the Tag you wish to filter the list by
  • The list will now update, showing only the Players that have your chosen tag.
  • Clear your selection using the Clear button

Tags and Rules

See our Rules page to see how you can use your Tags to implement Media and Element Rules